

Setting up your first home studio may sound like a daunting task, but all you really need is a dedicated room and some essential gear. This will provide you with the basics for your initial endeavors into recording, editing, mixing and playback of any content that you’ve created. A studio will have anyone with a knack for music covered, as well as anyone looking for better sound quality when churning out digital or web content.
Let’s Begin with the Gear
What might make you shudder is reading the cost of studio speakers or multi-channel mixing boards in professional studios. Yes, they have 6-figure price tags, but you don’t need the most expensive gear to get your creative juices flowing. You can start out small, and work your way up. An audio interface, a decent computer, a mic with a few accessories, a pair of headphones and monitor speakers is a good starting point. This gear covers all bases for producing and playback of quality, high resolution audio.
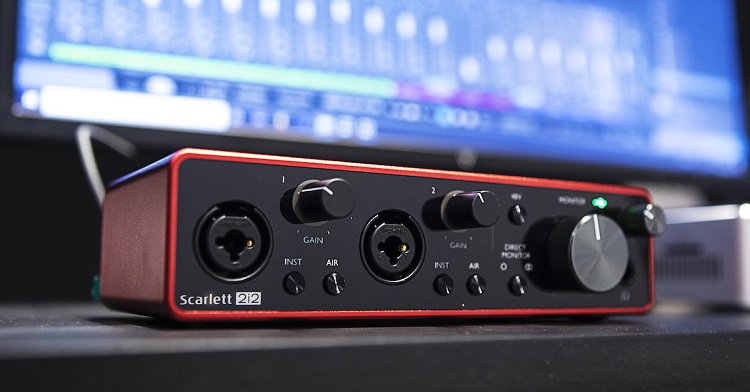
Audio Interface
Though your computer has a sound card, it’s not geared to high quality audio production and playback. This will only have a consumer grade input and output and connects a limited amount of your gear. To get the best possible results, you’ll want the best audio interface you can afford. This will have dedicated lines and connections for microphones, instruments, headphones and speakers, basically all the gear you’ll use in production and editing.
An audio interface works by converting the input analog audio from the music source into digital audio using a A/D converter. In effect sound is converted into 1s and 0s that can then be stored on the computer for mixing and editing purposes. When connected to headphones, or better still studio monitors, the interface plays back the edited music using a Digital-to-Analog or D/A converter.
Choosing the right interface largely depends on the computer ports. USB and Thunderbird are most common in this respect. And a professional usb audio midi interface is one of the most common on the market. It has a built in MIDI connection, so MIDI keyboards, samplers or DJ controllers are easy to setup.
When buying your nest audio interface, a key factor is the number of inputs and outputs. This will depend on the gear you plan to use in production and playback. If you only do podcasts, then a simple 2-in-2 interface with two inputs and two outputs will be more than enough to cover a microphone and pair of headphones. Further up are 4-in-4 interfaces, basically allowing for a small band setup, for instance with vocals and lead, bass and drums, and this can be played back through four monitors. The more complex and varied your gear gets, the more inputs and outputs you need.
Another thing to consider in a usb audio midi interface is latency, or the audio that is live and what you are hearing as playback through the headphones. Severe latency will sound like an echo, and can be frustrating in recording. But even the most budget-friendly interfaces will have ways (knobs) to control latency. They will also have high bit and sample rates (24-bit/196 kHz is great in a low-cost option) for the best possible sound quality.
Computer and Audio Software
You can use an older desktop, laptop, or MacBook, but newer is usually better. Get the computer that has better and faster processing power, with all the RAM you afford. A built-in or portable SSD is a necessity for storing your work. Computers need all their processing power to run Digital Audio Workstations (DAW), or the software that lets you record, edit and produce your work. DAW is essential in that it helps record and arrange your music, add effects and virtual instruments, use MIDI or digital keyboards, tune instruments, mix and master and more.
Microphones and Microphone Accessories
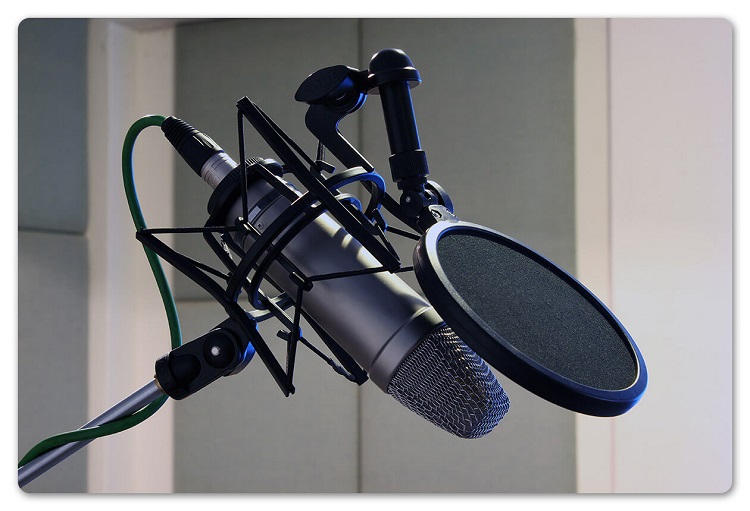
To get any speech into a podcast, or vocals into a track you’ll need a microphone. There are two types of microphones: condenser and dynamic. Condenser microphones are more suited for vocals or regular speech in a studio setting, whereas dynamic mics are better at conveying louder sounds, likes vocals or instruments in live settings.
You can start with a cardioid condenser mic and add instrument and dynamic microphones as you build up your studio. Microphones will usually include cables with XLR inputs for connectivity with the usb interface. For clearer studio sound, you’ll also want either a microphone holder, or better still a dedicated stand. To get clearer speech and vocals a pop filter is an indispensable piece of kit.
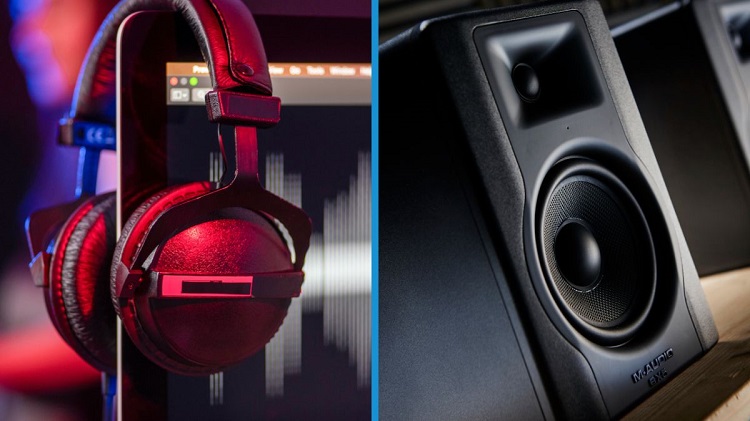
Headphones and Studio Monitors
Headphones and studio speakers are meant to reproduce the sound as it is, without any coloration. This means they won’t have extra bass, or overemphasize the highs so they differ substantially from consumer and home headphones and speakers. Closed back headphones are good for monitoring your work, while open backs are better in mixing and editing. To play back the final cut, again for the clearest possible representation, a dedicated pair of active studio monitors rounds the picture. Place them at an equal distance and angled towards you when mixing.
Room Acoustic Treatment
You’ll need to reduce resonating sounds that rebound off walls, ceilings, furniture, and any other surface. Acoustic treatment has the aim of making your room (or garage) more neutral and accurate when mixing and recording. Fibreglass panels are placed along the walls and ceiling and bass traps in the corners to prevent rebounding sounds. There is more sophisticated gear and entire acoustic treatment kits, but basic room treatment will be good for starters.